
Yes, most laptops can be upgraded to a faster or bigger SSD, and it's usually the smarter move before you buy new. Check your service manual to confirm the storage slot and form factor, back up everything first, then match the drive to your slot. Some laptops have soldered storage that rules this out entirely, so verify before you spend a penny.
TL;DR:
- Most laptops support SSD upgrades, but confirming whether storage is soldered or removable prevents wasted effort or damage.
- NVMe drives excel in video editing and large file transfers, while SATA SSDs are sufficient for everyday tasks and offer better value.
- Check your laptop's storage slot type, keying, and size carefully before purchasing an SSD to ensure compatibility.
- Back up all data thoroughly before swapping drives, and consider cloning if you want a quick transition or a clean install for better performance.
- For complex chassis, warranty concerns, or soldered storage, hiring a professional ensures a safe, proper upgrade with verified performance.
Table of Contents
- Which SSD type and form factor should you buy for your laptop?
- How do you check if your laptop's storage is actually upgradeable?
- How do you prepare your laptop and back up data before opening it?
- Cloning vs clean install: which migration method fits your situation?
- How do you physically install a new SSD in your laptop step by step?
- What BIOS/UEFI settings and checks matter after installing the new SSD?
- How do you benchmark performance and monitor SSD health after the upgrade?
- How do you troubleshoot a new SSD that won't boot or isn't detected?
- When should you hire a technician instead of doing the SSD upgrade yourself?
- Book a laptop SSD upgrade with Nicobytesolutions
- Sources
Which SSD type and form factor should you buy for your laptop?
Get this wrong and you'll be sending a drive back, so it's worth five minutes of homework before you open your wallet.
Two storage interfaces dominate laptops right now: NVMe and SATA. NVMe drives use PCIe lanes offering much higher sequential speeds compared to SATA SSDs, which are limited by an older bus originally designed for spinning hard drives. If your laptop currently has a mechanical hard drive, replacing it with even a basic SATA SSD transforms the machine. Boot times drop from a minute to under fifteen seconds, and everyday tasks like opening a browser or launching a spreadsheet stop feeling laggy.
The jump from SATA SSD to NVMe SSD is far less dramatic in daily use. Windows loads a few seconds faster and files copy quicker, but you won't feel the same night-and-day difference you got going from HDD to SSD. Where NVMe genuinely earns its keep is video editing, large file transfers, and gaming load times. If you're mostly browsing, writing documents, and streaming video, a good SATA SSD does the job for considerably less money.
Form factor is where people trip up. M.2 drives come in lengths commonly around 80mm and shorter variants, found in some ultrabooks and compact machines. There's also a keying difference that matters more than most buying guides admit. M-key slots take NVMe drives; B+M key slots can take either SATA or NVMe M.2 drives, depending on what the motherboard supports. Plugging an NVMe-only drive into a SATA-only M.2 slot simply won't work, no matter how hard you push it, so check your laptop's exact slot specification rather than assuming M.2 always means NVMe.
Older or budget laptops still often use a 2.5-inch SATA drive rather than M.2. These are the same physical size as a traditional laptop hard drive (usually 7mm thick, occasionally 9.5mm), so measure the bay before ordering.
For capacity, a few hundred gigabytes is generally needed for Windows and applications, with larger capacities offering more room for photos, games, and accumulated files. Don't obsess over TBW (Total Bytes Written) ratings for typical home or office use. Most modern SSDs are rated for hundreds of terabytes written, far beyond what a normal user achieves before the laptop itself is obsolete. PCMag's current SSD roundup is a decent starting point for comparing capacity against price across current drive generations.
- NVMe for editing, gaming, and heavy multitasking; SATA SSD for general browsing, office work, and budget upgrades
- M.2 2280 is the common laptop length; 2242 appears in smaller ultrabooks, so measure before buying
- Confirm M-key versus B+M key slot compatibility rather than assuming any M.2 slot takes any M.2 drive
- 500GB minimum, 1TB for comfort; endurance ratings rarely matter for typical home use
Pro Tip: Thin and light laptops often run PCIe Gen4 or Gen5 NVMe drives hotter than their chassis can dissipate, causing thermal throttling that quietly erases the speed advantage you paid for. If your laptop has limited airflow, look for a DRAM‑less or low‑profile drive rather than the fastest flagship on the shelf.
How do you check if your laptop's storage is actually upgradeable?
Before anything else, find out whether your laptop's storage can be swapped at all. Some ultrabooks and budget convertibles solder the storage chip directly to the motherboard, and no amount of screwdriver enthusiasm changes that.
- Find the service manual or maintenance guide. Search "[your laptop model] service manual" or "maintenance and service guide" and look for a section on storage, memory, or "user-replaceable components." Manufacturers usually publish these as free PDFs.
- Check the spec sheet for storage type. Product pages often state whether storage is "removable," "M.2 slot," or simply list a fixed capacity with no upgrade path mentioned, which is often (though not always) a hint.
- Identify the slot type once you're inside. If the manual mentions M.2, note whether it specifies NVMe, SATA, or both, and whether it's keyed M or B+M. If it mentions a 2.5-inch bay, note the drive thickness the chassis accommodates.
- Check standoff position for M.2 length. Most laptop motherboards have a single screw standoff positioned for either 2280 or 2242 length drives. The service manual sometimes shows this; otherwise, a quick look inside (with the laptop powered off) will confirm it.
- Search for known soldered-storage models. Several thin-and-light laptop ranges from major manufacturers use soldered eMMC or soldered NVMe on lower-spec configurations, while higher-spec versions of the same model line get a socketed M.2 slot. The only reliable way to know which you have is checking your specific model and configuration number, not just the model name.
If your laptop turns out to have soldered storage, you're not entirely stuck. An external SSD connected over USB can offload files and speed up storage-heavy tasks, though it won't touch your boot drive speed. For laptops where the soldered drive is genuinely too small and slow for daily use, replacing the whole machine may be the more sensible long-term move, particularly if it's already several years old and showing its age elsewhere too. And if you're unsure whether your model has a socket or solder, a professional can open the chassis and check in minutes rather than you risking a fragile keyboard deck or ribbon cable.
How do you prepare your laptop and back up data before opening it?
Skipping preparation is how a straightforward upgrade turns into a lost afternoon and, occasionally, lost photos. Do these steps properly and the actual hardware swap becomes almost anticlimactic.
Back up everything, twice if you can manage it. A full disk image backup captures your entire operating system, settings, and files in one restorable package. Tools built into Windows (File History, backup and restore) handle basic file backups, but for a full image before a hardware change, dedicated cloning software does a more thorough job. Keep a second copy on a separate external drive or in the cloud. HP's own migration guidance is explicit on this point: back up before you touch the hardware, not after something goes wrong.
If you're moving to a smaller SSD, declutter first. Cloning software can shrink partitions to fit a smaller target drive, but only if your used data is actually smaller than the new drive's capacity. Uninstall unused programs, clear your Downloads folder, and empty temp files before you start. It genuinely speeds up the clone and reduces the chance of an error partway through, according to Build PC Guide's migration notes.
Gather your tools before you start rather than mid-job:
- A USB‑to‑M.2 or USB‑to‑SATA enclosure (or adapter cable) to connect the new drive for cloning
- A precision screwdriver set with small Phillips and Torx bits (laptop screws are tiny and strip easily with the wrong driver)
- An anti-static wrist strap or mat, especially if you're working on carpet in dry weather
- A spudger or plastic pry tool for prising off the bottom panel without cracking the plastic clips
- Good lighting and a clear, static-free workspace
Pro Tip: Take a photo of the screw layout before removing the bottom panel. Laptop screws frequently come in slightly different lengths for different holes, and mixing them up can strip a thread or, worse, let a screw punch through into a component underneath.
A word of caution on warranty: opening the base of some laptops, particularly ones under an active manufacturer warranty, can technically void that cover if there's a tamper seal over a screw. Check your warranty terms first. If the laptop is still covered and the upgrade feels risky, or if you're not confident with a screwdriver near a battery, it's worth getting a professional to handle it rather than risk a warranty claim later.
Cloning vs clean install: which migration method fits your situation?
Cloning wins for speed and convenience; a clean install wins for a genuinely fresh, clutter-free system. Neither is wrong, but they suit different situations.
Cloning copies your entire drive, operating system, installed programs, settings, and files, onto the new SSD exactly as it was. Boot it up and you're working within minutes, no reinstalling software, no hunting for licence keys, no reconfiguring your email client. Backblaze's upgrade guide notes this is the far more common route for most home upgraders precisely because it's so low-friction, and it also suggests keeping your old drive as external secondary storage once you've confirmed the new SSD boots reliably.
A clean install wipes the slate and reinstalls Windows fresh. It takes longer because you're reinstalling every application and restoring personal files separately, but it strips out years of accumulated background bloat, orphaned drivers, and startup clutter that quietly slows older systems down. If your current laptop has been running for several years without a reinstall, a clean install alongside the SSD upgrade often delivers a noticeably snappier result than cloning that same slowdown onto faster hardware.
Recommended tools and technical notes:
- Cloning software choices include Macrium Reflect, Acronis, and manufacturer-specific tools like Samsung's own migration utility, which Samsung's official upgrade guidance recommends for their own drives specifically
- Confirm your new drive is initialised as GPT, not MBR, if your laptop boots via UEFI. How-To Geek's cloning walkthrough covers this initialisation step in detail
- If your laptop has BitLocker encryption enabled, decrypt or suspend it before cloning, or the clone can fail partway through
- Windows activation is tied to your hardware, not the drive, so a cloned or freshly installed OS on the same laptop should reactivate automatically once connected to the internet
Estimated clone time: a 250GB drive with moderate data typically clones in 30 to 60 minutes; 500GB to 1TB can take one to three hours, depending heavily on your USB enclosure's speed. A cheap USB 2.0 adapter will bottleneck the process badly regardless of how fast your new SSD is, so a USB 3.0 or better enclosure is worth the extra few pounds.
The most common pitfall isn't the software, it's a failing source drive. If your old hard drive is already showing signs of failure (clicking noises, freezing, slow file access), cloning software may struggle or produce a corrupted copy. In that case, a fresh install with a manual file recovery pass is often safer than trusting a clone from a dying disk.

How do you physically install a new SSD in your laptop step by step?
This is the part that looks intimidating and turns out to be mostly patience and the right screwdriver. Work through it in order and don't skip the safety steps, even if the laptop's "off."
- Shut down completely and unplug the charger. Don't just close the lid, fully power off, then hold the power button for ten seconds to discharge any residual charge in the circuits.
- Remove the battery if it's user-removable. Many modern laptops have internal, non-removable batteries; if yours does, at minimum disconnect the battery connector once you're inside, before touching any storage connector.
- Ground yourself before touching internals. Touch a metal, unpainted surface or wear an anti-static strap. Static discharge is invisible and can quietly damage a drive or motherboard component.
- Remove the bottom panel screws and gently pry it open. Work around the edges with a plastic tool rather than metal, and don't force any clip that seems stuck; there's usually another screw you've missed.
- Locate the existing drive. For M.2, it's a small rectangular stick screwed at one end, roughly the size of a stick of gum. For 2.5-inch SATA, it's a small drive in a bay, often held in a caddy or bracket with a connector on one edge.
For an M.2 swap:
- Remove the single retention screw holding the drive's far end down, and the drive will pop up at a slight angle.
- Slide the old drive out of the slot at that same angle, don't force it flat.
- Insert the new drive at the same angle, aligning the notch on the connector edge with the matching key in the slot. This alignment is exactly why M-key and B+M key compatibility matters so much; a mismatched key simply won't seat.
- Once seated, press the far end down gently until it's flush with the standoff, then replace the retention screw. Don't overtighten, snug is enough; laptop screws strip easily.
For a 2.5-inch SATA swap:
- Remove any bracket or caddy screws holding the old drive in its bay.
- Slide the drive out of its connector, which usually requires a firm, straight pull rather than lifting.
- Check the new SSD's thickness matches the bay (7mm is standard; some older laptops need 9.5mm, sometimes with a spacer).
- Transfer the caddy or bracket to the new drive if your laptop uses one, then slide it back into the connector and secure the screws.
If your laptop only has one drive slot, you can't run the old and new drives side by side to clone directly. Connect the new SSD externally via a USB enclosure first, clone onto it while it's still external, confirm the clone boots correctly using a boot menu test if your enclosure and laptop support it, then power down and physically swap the drives as above. This adds a step but avoids needing two internal slots.
Pro Tip: Reseat the drive fully before assuming it's faulty if the laptop won't boot. A surprising number of "dead SSD" panics are actually a connector that isn't fully home, especially on M.2 drives where the insertion angle is easy to misjudge on the first attempt.
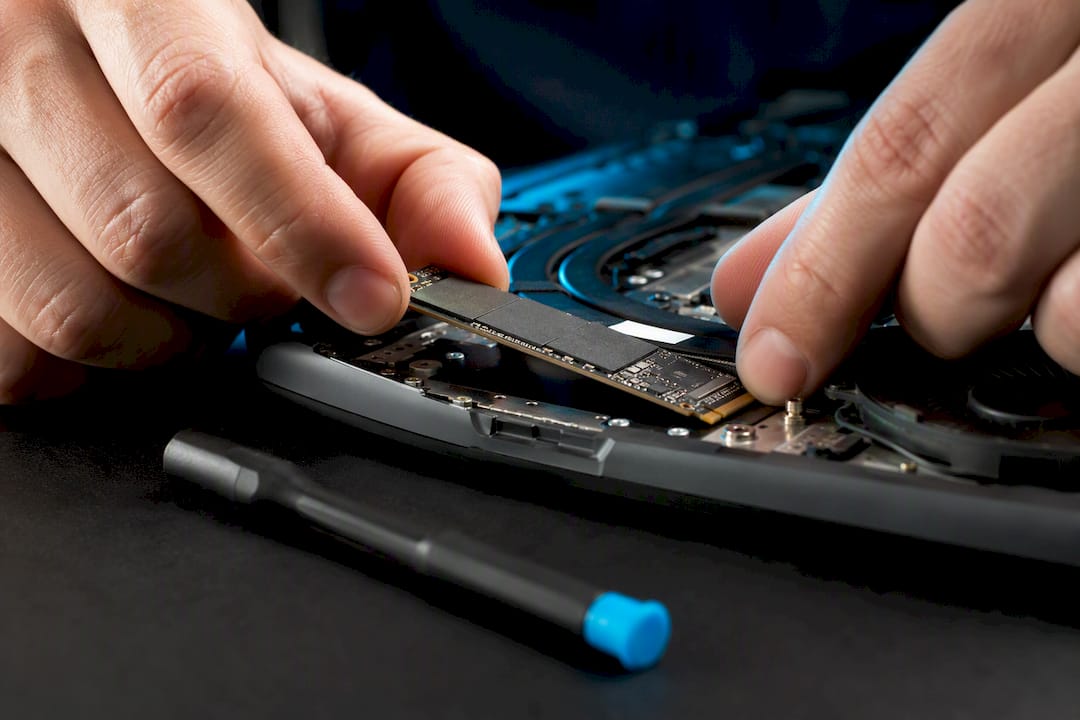
Once reassembled, if the new drive isn't recognised at all when you power on, don't panic yet: reopen the panel and confirm the connector is fully seated and the retention screw isn't over-torqued, warping the board slightly. If it's still not detected, it's worth entering the BIOS to check whether the drive appears there at all, which tells you whether it's a connection issue or something needing further diagnosis.
What BIOS/UEFI settings and checks matter after installing the new SSD?
Getting the drive physically installed is only half the job; a few settings determine whether it actually boots and performs the way it should.
Power on and enter the BIOS or UEFI setup, usually by pressing F2, F10, Del, or Esc during startup (the exact key varies by manufacturer and is usually shown briefly on the boot screen). Check the boot order and confirm the new SSD is listed as the primary boot device, particularly important if you cloned via USB and the laptop is still defaulting to the external drive.
Confirm the storage controller mode is set correctly. Most modern laptops default to AHCI for SATA drives and native NVMe support for M.2 NVMe drives, but older BIOS versions occasionally default to a legacy or RAID mode that can prevent Windows from seeing the drive properly.
Once you're back in Windows:
- Open Disk Management (search "Create and format hard disk partitions") to confirm the drive shows its full capacity and isn't leaving unallocated space unused
- Extend the main partition if cloning software left unallocated space, right-click the partition and choose "Extend Volume"
- Confirm TRIM is enabled by opening Command Prompt as administrator and running
fsutil behavior query DisableDeleteNotify; a result of 0 means TRIM is active, which keeps the SSD performing well over time - Disable scheduled defragmentation for the SSD specifically, since defragmenting an SSD offers no benefit and adds unnecessary write cycles
Run a quick benchmark to confirm the drive is performing as expected. CrystalDiskMark is the standard free tool for this. A healthy SATA SSD should show sequential read/write speeds in the 500 to 550 MB/s range. A healthy NVMe drive on a proper PCIe Gen3 connection typically shows 1,500 to 3,500 MB/s, and Gen4 drives can exceed 5,000 MB/s under the right conditions. If your numbers come back dramatically lower than the drive's advertised speed, particularly for NVMe drives showing SATA-like numbers, it's often a sign the M.2 slot itself only supports SATA mode, not that the drive is faulty.
How do you benchmark performance and monitor SSD health after the upgrade?
Once everything's running, two free tools give you the full picture: CrystalDiskMark for speed, and CrystalDiskInfo for ongoing health.
Run CrystalDiskMark a day or two after installation, once Windows has settled and isn't still indexing files in the background, for a more accurate baseline reading. Compare the sequential read/write figures against the drive's advertised specification. A gap of ten or fifteen percent below the rated figure is normal; a gap of fifty percent or more usually points to a connection issue, an outdated driver, or the slot running in a lower mode than expected.
CrystalDiskInfo monitors SMART data, the drive's own internal health reporting, and flags it with a simple colour system: blue for good, yellow for caution, red for a drive nearing failure. Check the "Health Status" field occasionally, particularly the reallocated sector count and total bytes written, to catch a failing drive early rather than after it's already caused data loss.
Set a calendar reminder to glance at this every few months rather than obsessively checking daily. SSDs don't fail the way mechanical hard drives do, with gradual clicking and slowdown; they tend to work perfectly until they don't, so a periodic health check is more useful than constant monitoring.
How do you troubleshoot a new SSD that won't boot or isn't detected?
Drive not detected in BIOS at all almost always means a connection problem, not a dead drive straight out of the box. Reopen the panel, reseat the M.2 drive at the correct angle, or fully reconnect the SATA cable and power connector, then check again.
Detected in BIOS but Windows won't boot is usually a boot order or partition style mismatch. Confirm the SSD is set as first in the boot order, and if you cloned the drive, check that it's formatted as GPT rather than MBR if your system boots via UEFI, since a GPT/MBR mismatch is one of the most common causes of a cloned drive failing to boot.
Stuck on a manufacturer logo or black screen often resolves by disabling legacy/CSM boot mode in the BIOS if the new drive was cloned using UEFI-based tools, or by double-checking that Secure Boot settings weren't inadvertently changed.
Clone completed but the drive shows less capacity than expected typically means unallocated space was left over from resizing during the clone. Head into Disk Management and extend the volume to reclaim it.
If none of these resolve it, the drive itself may have a manufacturing fault, which is rare but not unheard of, and worth testing with the manufacturer's own diagnostic utility before assuming installation error.
When should you hire a technician instead of doing the SSD upgrade yourself?
Most SSD upgrades are genuinely doable by a careful, methodical person with the right screwdriver and twenty minutes to spare. But there are specific situations where booking a professional is the sensible call, not an admission of defeat.
Soldered storage is the clearest case. If your laptop has no socketed slot at all, there's no DIY fix, and continuing to search for one just wastes time. A technician can confirm this in minutes with the chassis open, and advise honestly on whether an external drive helps or a replacement machine makes more sense.
Warranty concerns matter too. If your laptop is still under manufacturer cover and you're not certain whether opening it voids that warranty, a professional who does this daily will know the specific model's rules far better than a forum post will.
Some chassis designs are also just genuinely difficult, with hidden screws under keyboard decks, delicate ribbon cables routed across the battery, or adhesive-sealed panels that crack if you're impatient. If a teardown video for your exact model shows more than a couple of screws and a straightforward panel, it's reasonable to hand it to someone who's opened that specific model before.
A reputable upgrade service should offer fixed pricing agreed before work starts, so there's no surprise invoice, a no‑fix, no‑fee policy so you're not paying for a diagnosis that goes nowhere, and a proper backup and post‑install testing process so your data and your new drive's performance are both verified before you're handed the laptop back.
At Nicobytesolutions, that's precisely how upgrades are approached across Bolton, Manchester, and Lancashire: transparent pricing quoted upfront, careful backup of existing data before any hardware is touched, and a benchmark check once the new drive is installed so you know it's performing correctly, not just that it powers on.
— NicoByte
Book a laptop SSD upgrade with Nicobytesolutions
Nicobytesolutions is the straightforward alternative to a DIY gamble or an unpredictable repair-shop quote for homeowners and small businesses across Bolton, Manchester, and Lancashire, fixed pricing agreed before any screwdriver comes out, and a no‑fix, no‑fee policy if the upgrade genuinely can't be done.

If you've read through the steps above and you're confident with a screwdriver and an anti-static strap, go for it, that's exactly what this guide is for. But if your laptop has a fiddly chassis, you're not sure whether the storage is soldered, or you'd simply rather someone experienced handled your backup and the physical swap while you get on with your day, that's where Nicobytesolutions comes in. Every upgrade includes a full data backup beforehand, a proper compatibility check of your specific model, and a post‑install performance test so you leave knowing the new drive is genuinely faster, not just newly installed.
Get in touch through the Nicobytesolutions website to book an on‑site or collection‑based SSD upgrade, with honest advice on whether your laptop is worth upgrading at all before any work is booked in.